Jekyll: Setting up your development environment
Update in progress: This post is based on an older setup and is being kept for reference while I work on a fuller update.
Jekyll is a static site generator built with Ruby. It can be a great alternative to WordPress when you want to avoid the overhead of a database-driven site.
Requirements
To use Jekyll, you will need to have Ruby installed.
Install Jekyll dependencies
To install Jekyll, run the following command:
gem install jekyll bundler
You can also import your existing WordPress posts by first exporting your blog to an XML file using the WordPress export tool.
Once the export file is ready, install the Jekyll Importer with the command below:
gem install jekyll-import
Here are a few other plugins that may be useful for your blog:
There is a larger list on the Jekyll website, organized by category.
A new Jekyll instance
Skip to the next section if you want to import an existing WordPress blog.
First, run the command below, replacing my-site-name with the folder name for your site.
jekyll new my-site-name
cd my-site-name
bundle exec jekyll serve
Sample output for running jekyll new my-site-name:
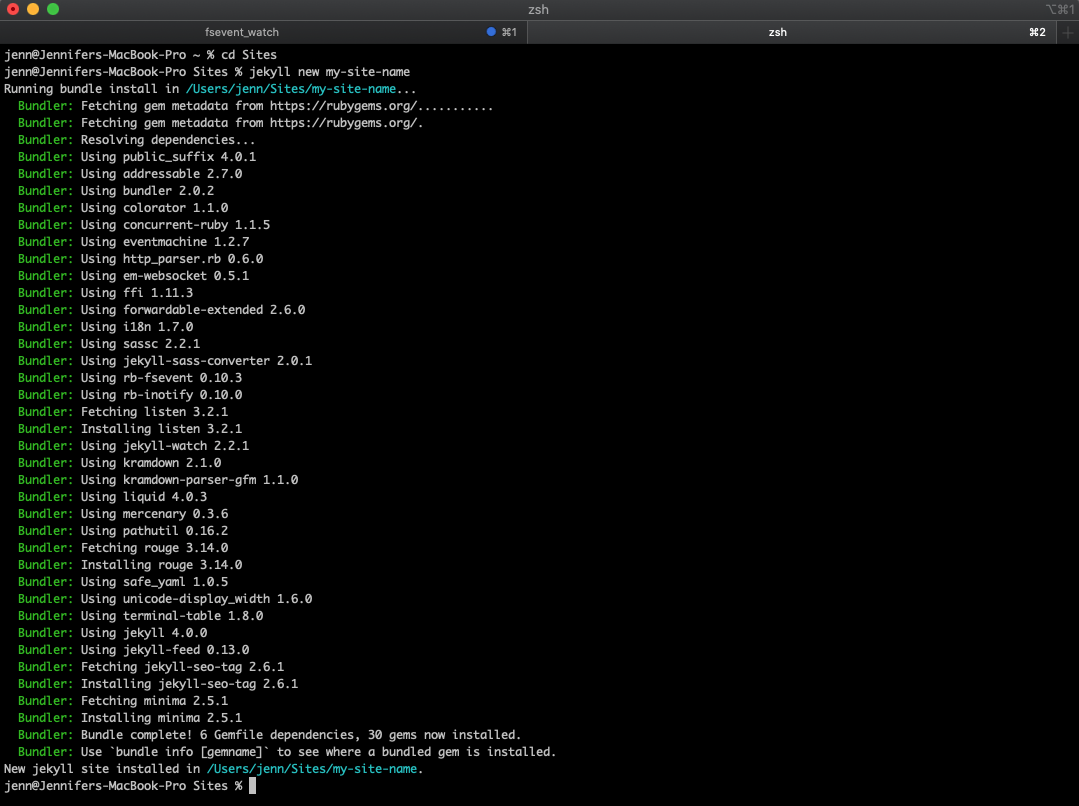
Jekyll will now generate a site in the my-site-name folder.
To override the default Jekyll theme, you may need to create folders such as assets, sass, _includes, and _layouts. For more information, see overriding theme defaults.
_config.yml: stores site configuration data such as the site name, description, and base URL. Check out my sample config file._posts: where your posts are stored in Markdown or HTML format. Check out my sample post formatting._site: where the generated production files are built.about.md: the about page for your site.feed.xml: your RSS feed file, usually generated automatically.index.md: your site’s main page.404.html: your site’s “page not found” file.Gemfile: the list of Ruby gems used by the site.assets: where you can store JavaScript and other files.sass: your Sass files._includes: stores shared pieces such as the menu, header, footer, or analytics code._layouts: combines your includes into layouts for posts, pages, and the index.
cd my-site-name
bundle exec jekyll serve
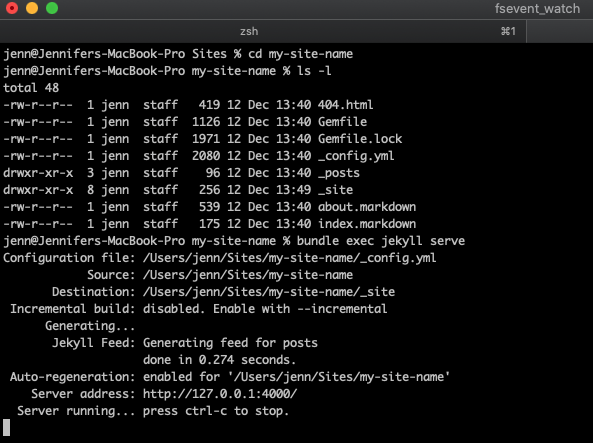
Below is what the directory looks like in the terminal, along with the output from running the serve command to preview the site locally:
WordPress import instructions
Use one of the links below depending on whether your site is hosted on WordPress.com or self-hosted WordPress:
Drafts
To work on a post locally without publishing it, create a folder at the root called _drafts. Then add a Markdown or HTML file without the date in the filename, for example template.html instead of 2019-12-11-template.html.

Finally, run the following in your terminal:
bundle exec jekyll serve --drafts
Changes can be previewed on the fly using this method as well. When you are ready to publish, move the file to _posts and add the date.
Ruby 3.0+ issues
As noted in the Jekyll GitHub issue, you may need to run the following command:
bundle add webrick
Publishing your new site
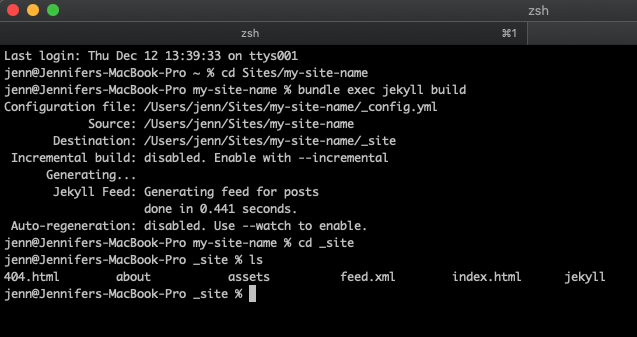
The final step is to push your site online. First, instead of jekyll serve, you will want to run jekyll build as shown below. This replaces your development paths with your production configuration. You may also want to read Jekyll: The configuration file.
bundle exec jekyll build
Move into the root of _site. These are the production-ready files that should be uploaded to your server.
The first screenshot below shows the root of my Jekyll site, while the second shows the production-ready files. Note that some files from the root of the Jekyll site are not included, since these are excluded in _config.yml.
Note that if you use GitHub Pages, you may need to compile the files on your computer first and then commit the generated files to the appropriate branch.